I love Halloween treats and sweets. There are so many fun options, themes and bright colors to work with. These easy Halloween Cookie Pops are one of my absolute favorite cookies from my book, Smart Cookie.
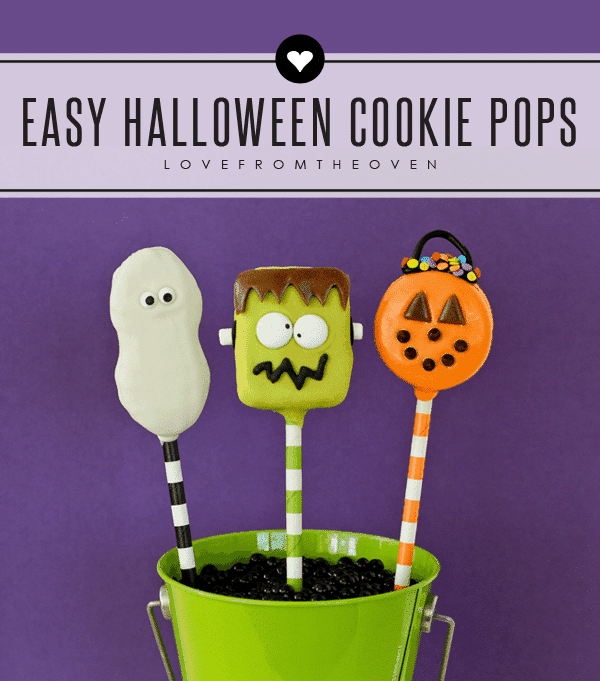
Seriously, how cute are these cookies? And they are SO easy to make. 🙂 I think the little Frankenstein guy is my favorite. He’s a little to sweet to be spooky. You start with store bought cookies (no baking required!) and get right to the decorating.
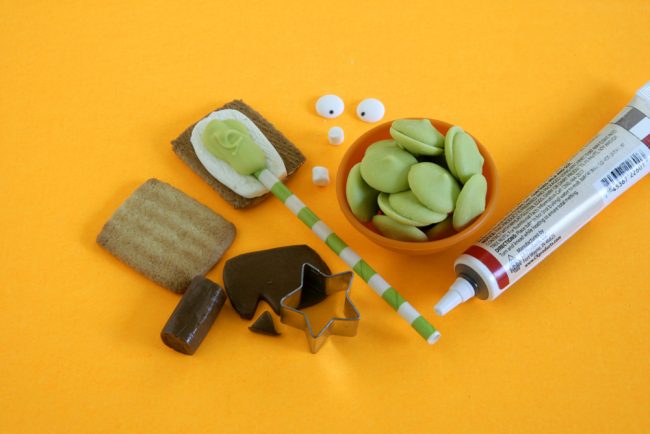
The recipe below lists the ingredients and instructions for each of the three pops. You don’t have to make all of them, feel free to pick your favorite style and make it, but don’t be afraid to try all of them, they are SUPER easy! No tricks, I promise. 🙂
Make sure to also try my Easy Halloween Cookies and Easy Halloween Cupcakes!
Easy Halloween Cookie Pops
Ingredients
Ghost Pops
- 12 Nutter Butter cookies
- 12 ounces white candy coating
- 24 candy eyes
Monster Pops
- 12 rectangle shaped sandwich cookies
- 12 ounces light green candy coating mix bright green and white candy coating if you cannot find light greeh
- 6 Tootsie Roll® Chocolate Midgee candies
- 24 candy eyes
- 24 Kraft Jet-Puffed Mallow Bits
- Black candy writer
Jack O Lantern Pops
- 12 round sandwich cookies
- 12 ounces orange candy coating
- 3 Tootsie Roll® Chocolate Midgee candies
- 1/2 cup mini chocolate chips
- in Black lace licorice cut into 1.5” segments, about 18” length
- Black candy writer
- cup Multi colored sprinkles about 1/4
Instructions
Ghost Pops
- Prepare white candy coating according to package direction. Carefully twist apart Nutter Butter cookies and lay out on baking sheet lined with waxed paper. Using a lollipop stick or straw, make an indentation into the filling of each cookie. Dip the end of a lollipop stick or straw into the candy coating, covering about 1” of the stick in the candy coating, and then gently press it into the indentation in the filling of a cookie. Place 1 to 2 teaspoons of additional candy coating onto the top of the stick where it is pressed into the filling. Place the top of the cookie back onto the cookie. Repeat with remaining cookies, then carefully place into the refrigerator to chill for at least 15 minutes.
- If needed, reheat candy coating according to package directions. Working one cookie at a time, remove cookie from refrigerator and holding the stick, dip the cookie into candy coating, completely covering cookie by dipping and spooning candy coating over cookie. Let excess candy coating drip off of cookie and back into container. Place cookie onto a baking sheet lined with wax paper. Immediately place two candy eyes onto candy coating covered cookie. Allow to dry for at least one hour.
Monster Pops
- Prepare light green candy coating according to package directions. Carefully twist apart sandwich cookies and lay out on baking sheet lined with waxed paper. The short sides of the cookies should be used as the top and bottom. Using a lollipop stick or straw, make an indentation into the filling of each cookie. Dip the end of a lollipop stick or straw into the candy coating, covering about 1” of the stick in the candy coating, and then gently press it into the indentation in the filling of a cookie. Place 1 to 2 teaspoons of additional candy coating onto the top of the stick where it is pressed into the filling. Place the top of the cookie back onto the cookie. Repeat with remaining cookies, then carefully place into the refrigerator to chill for at least 15 minutes.
- Unrwap Tootsie Roll® Chocolate Midgee candies. Using a small roller, roll out candies to roughly 1/4 inch thick to create the monster hair. Using either a small knife or cookie cutter, cut candy into rectangle shape the same width as the short side of the sandwich cookies. Cut out triangle shapes to create a jagged edge. Repeat process to create 12 pieces of candy hair for cookies.
- If needed, reheat candy coating according to package directions. Working one cookie at a time, remove cookie from refrigerator and holding the stick, dip the cookie into candy coating, completely covering cookie by dipping and spooning candy coating over cookie. Let excess candy coating drip off of cookie and back into container. Place cookie onto a baking sheet lined with wax paper. Immediately place two candy eyes and chocolate candy hair onto candy coating covered cookie. Allow to dry for at least one hour.
- Prepare black candy writer pen according to package directions. Squeeze a small jagged line of black candy coating onto cookie to create monster mouth. Squeeze a dollop of chocolate candy coating onto one side of the cookie pop approximately half way down the cookie, and immediately place a Jet-Puffed Mallow Bit onto the black candy coating. Hold Mallow Bit in place until candy coating starts to set. Repeat on other side of cookie, then place cookie onto baking sheet lined with wax paper. Repeat with remaining cookies. Allow to dry for at least two hours.
Jack O Lantern Pops
- Prepare orange candy coating according to package directions. Carefully twist apart sandwich cookies and lay out on baking sheet lined with waxed paper. Using a lollipop stick or straw, make an indentation into the filling of each cookie. Dip the end of a lollipop stick or straw into the candy coating, covering about 1” of the stick in the candy coating, and then gently press it into the indentation in the filling of a cookie. Place 1 to 2 teaspoons of additional candy coating onto the top of the stick where it is pressed into the filling. Place the top of the cookie back onto the cookie. Repeat with remaining cookies, then carefully place into the refrigerator to chill for at least 15 minutes.
- Unrwap Tootsie Roll® Chocolate Midgee candies. Using a small roller, roll out candies to roughly 1/4 inch thick. Using either a small knife or cookie cutter, cut candy into 24 small triangle shapes to create jack o’ lantern eyes.
- If needed, reheat candy coating according to package directions. Working one cookie at a time, remove cookie from refrigerator and holding the stick, dip the cookie into candy coating, completely covering cookie by dipping and spooning candy coating over cookie. Let excess candy coating drip off of cookie and back into container. Place cookie onto a baking sheet lined with wax paper. Immediately place two chocolate triangle eyes onto cookie and place mini chocolate chips onto cookie to create a nose and mouth. Repeat with remaining cookies and allow to dry for at least one hour.
- Prepare black candy writer pen according to package directions. Squeeze a dollop of black candy coating, approximately the size of a penny, onto the top of a cookie pop. Sprinkle rainbow colored sprinkles over candy coating. Squeeze two additional small dollops of black candy coating onto both sides of the rainbow sprinkles. Place a piece of black licorice onto the top of the cookie, with ends in dollops of black candy coating, to create a handle. Hold in place until candy coating starts to set and can hold licorice on it’s own. Place on a baking sheet covered in wax paper to dry for at least two hours. Repeat with remaining cookies.
Disclaimer
Nutrition information is estimated as a courtesy. If using for medical purposes, please verify information using your own nutritional calculator. Percent Daily Values are based on a 2000 calorie diet.
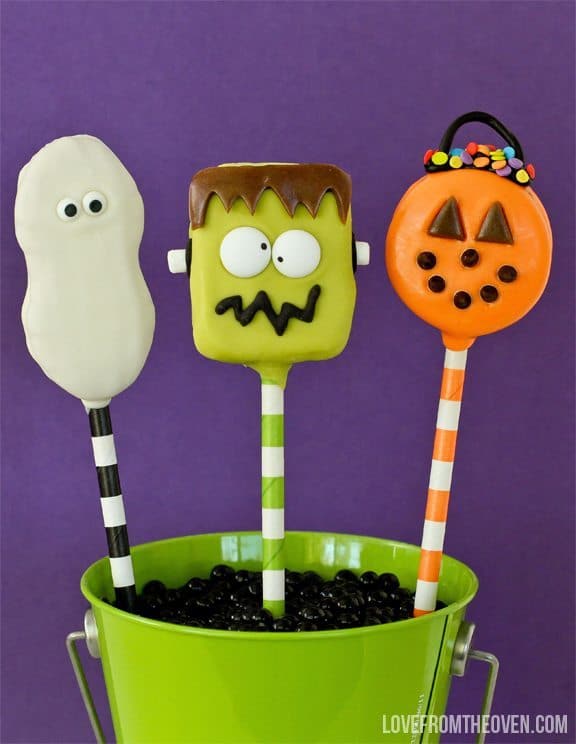
If you love how fun and easy these are, you will love my book, SMART COOKIE. You can order it on Amazon, and it’s also available at Barnes and Noble, Michaels and JoAnn’s stores.



libby says
they are so cute and perfect for Halloween
Joan Hayes says
These are so fun , and adorable, and you make them look so easy! I might just have to try these (just wish me luck) hah!
Christi says
Thanks, Joan! 🙂 Maybe I should come back there and make them with you? Or you come here, I’m pretty sure I could put together a committee that would totally approve of that idea!
Beth @ Hungry Happenings says
So cute. I love the monster best too! Where did you find the candy eyes that have tiny little pupils? They are fantastic. I’ve got every single size of candy eye with large pupils, but would like to find some with the small pupils.
Christi says
Beth, I’m pretty sure that I found those at ABC Cake Decorating here in Phoenix. They might have them available through their site online at http://www.cakearts.com.