If there is one thing you probably do not see a lot here on Love From The Oven, it’s pie. Pie has always been a bit intimidating to me. But the variety and options that you can create with pie are almost endless (and my husband LOVES it), so I need to kick my pie making into a higher gear. It’s something I’ve been reading up on and learning more about and starting to branch out into more.

Ken has recently started a website, The Pie Academy, that is an amazing resource for pie bakers of any experience level It is packed full of recipes, training and the tools you need to make your own pies. Ken has generously offered to share one of his recipes (with SIX great variations!) and some of his expertise with us here at Love From The Oven. I am so excited to have him share his wisdom, as well one of his delicious recipes. I can’t thank him enough for sharing with us. Now I will let Ken take over…
One Great Apple Pie, Six Sensational Variations
Everything I ever needed to learn about apple pie I learned from my dad, a weekend baker whose magical way with pie Iʼve spent the better part of my life trying to emulate. Like myself, dad was a self-taught baker who took great joy in the simple act of creating something delicious out of everyday ingredients.
Dad made his pastry by hand, so I canʼt be entirely sure how he would have felt about the food processor recipe Iʼve come to like so much. I suspect he would have liked it. Dad was a woodworker and he had great respect for his tools. He would have appreciated the way the food processor makes a great pie dough in short order.
I think you will, too, which is why Iʼve included it. Any of your favorite pastry recipes will work here, but if you havenʼt made pie dough with a food processor, I hope youʼll try it. The key is to always use short bursts when youʼre mixing pie dough, little one-half- to one-second pulses.
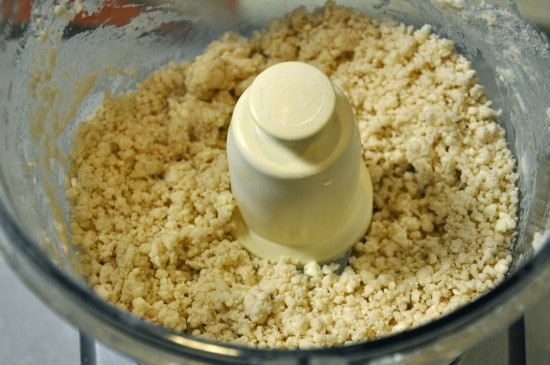
Once you add the water, pulse the machine just until the dough forms clumpy crumbs like these. Donʼt let the dough ball up around the blade.
Incidentally, if youʼre baking a pie that requires a top and bottom crust, prepare the dough twice rather than making a double batch in the processor all at once. It can be done, but most processors are cramped with a double batch and you donʼt get a nice, evenly mixed dough. It will only take a minutes to make a second batch.
Turn those crumbs out onto your counter, pack them into a ball, and flatten it into a 3/4”- thick disk on a sheet of plastic wrap. Wrap, then refrigerate for 1 to 2 hours before rolling. Chilling is important. If gives the fat time to firm up and makes the dough much easier to roll.
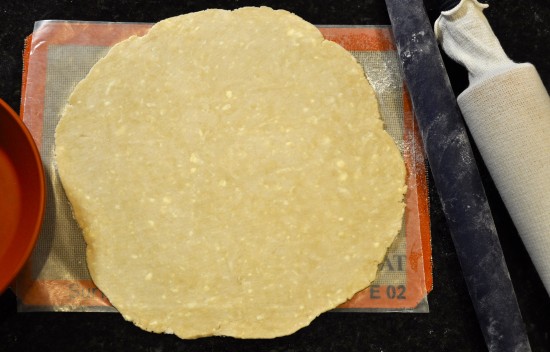
Notice that I roll the dough onto a sheet of lightly-floured wax paper. I use a silicone baking mat below it, to keep the paper from sliding around on my counter. By the way, the pin closest to the pastry is my French pin, which I typically use when I start rolling the dough because it gives me good control. I finish with the larger pin, which is covered with a rolling pin cloth that helps prevent sticking.
I like wax paper because itʼs 12” wide so I know – for my typical 9” deep-dish pie pan – I need to roll the pastry into a circle about 13” across. So when my pastry hangs just a little off each side of the paper, Iʼm good. Then I flip the paper over my pan, center the pastry, and carefully peel off the paper. Gently tuck the pastry into the pan without stretching it, and let the dough hang over the edge for now.
If youʼre adding a crumb topping and not a top crust, trim the dough so the overhang is about 1/2” – 3/4” all around, then shape into an upstanding edge. Make a ruffled edge, if desired. If youʼre adding a top crust, just let the overhang hang there. Refrigerate while you slice your apples and prepare your filling.
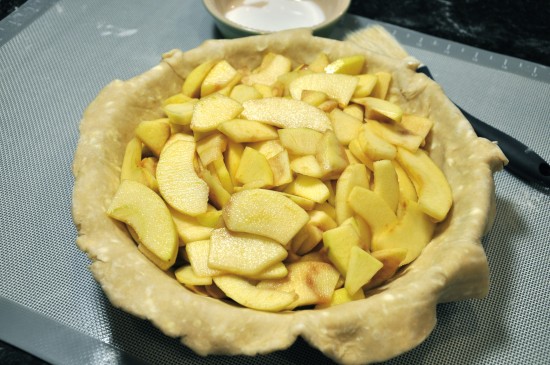
Hereʼs our apple filling in the shell, below. I use 7 cups of sliced apples for a 9” or 9 1/2-” deep-dish pie pan; if your pan is smaller, 6 cups will probably be enough. One little trick that helps me fit more apple slices in the pie is microwaving the apples in a large bowl for about 3 minutes. Thatʼs not long enough to cook the apples, but it does soften and compact them just a bit.
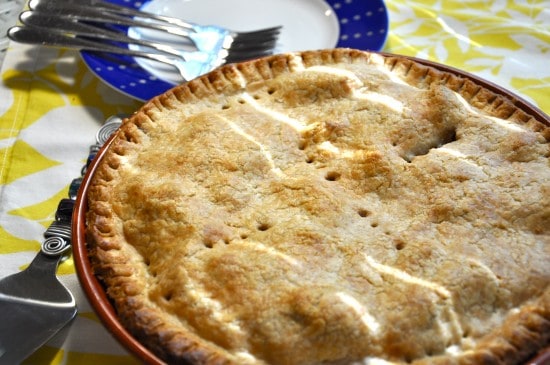
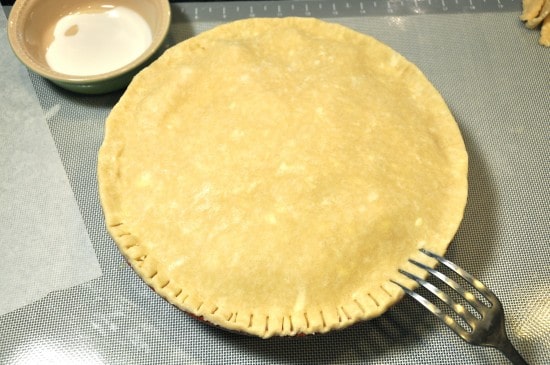
Spread the apples in the pastry shell. Then roll the top pastry, moisten the edge of the shell, and flip the second pastry on top. Press along the edge, to seal, and then – using a butter knife – trim the pastry flush with the edge of the pan. (Save the trimmings and pack together. You can refrigerate or freeze this dough to make another small pie shell later, or pie crust “cookies” brushed with butter, sprinkled with cinnamon sugar and baked.) Seal the edge with a fork. There are fancier ways to make an edge, but I like the rustic look of this fork-crimped edge, made with my big pastry fork.
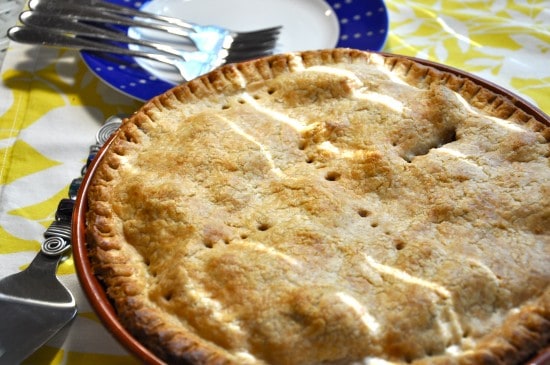
While youʼre at it, poke a few steam vents in the top pastry with your fork. Put a couple of them near the edge: when you see thick juice bubbling up there late in the baking, youʼll know your pie is done.
Bake your fruit pies in a preheated oven, on the center rack. I usually start them at 400° for about 25 minutes, then lower to 375° and bake for another 25 minutes or so. If Iʼm adding a crumb topping, that goes on during the second half of the baking. Just slide the pie out of the oven, carefully dump the crumbs over the pie, then rake them around with a fork to spread them out.
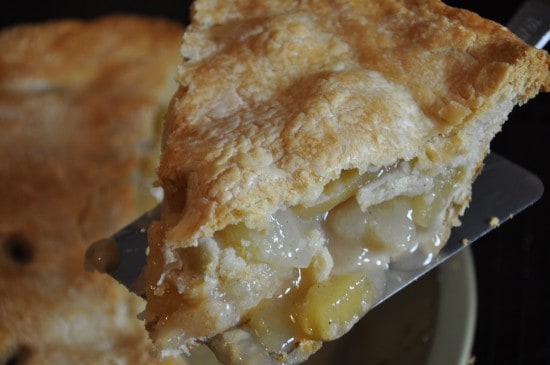
And hereʼs a slice of our finished pie – the apple-pear variation youʼll find below. The pears are a really neat surprise and Iʼve never served this to anyone who didnʼt go nuts for the combination. As for the crust, look at the flakiness – thatʼs the hallmark of fabulous homemade pastry.
So give it a try and let me know how it turns out. And if youʼd like to learn more about pie making, head on over to The Pie Academy and sign up for great recipes, pie making videos, and weekly pie updates. Itʼs free.
Thank you SO much to Ken for sharing with us! He truly is a master baker and a wealth of baking knowledge. I could go for a slice of that apple pie right now! I have the vanilla ice cream ready and waiting in the freezer. Make sure to head over to The Pie Academy as well as Ken’s Facebook page. Now here are your recipes from Ken, enjoy!
One Great Apple Pie, Six Sensational Variations
Ingredients
Pastry
- 1 1/2 cups all-purpose flour
- 1 teaspoon sugar
- 1/2 teaspoon salt
- 5 tablespoons cold unsalted butter, cut into 1/4” pieces
- 4 tablespoons cold vegetable shortening in tablespoon-size pieces
- 1/4 cup ice cold water
Filling
- 6 to 7 cups peeled and sliced apples
- 1/3 cup plus 1 tablespoon sugar
- 1 tablespoon lemon juicem
- 1/2 teaspoon grated lemon zest
- 1/4 teaspoon nutmeg or cinnamon
- 1 1/2 tablespoons cornstarch
- Milk or light cream for glaze
Instructions
Dad's Pastry
- 1. Combine the flour, sugar, and salt in the bowl of a food processor. Pulse the machine once or twice, to mix. Scatter the butter over the flour. Pulse 4 or 5 times, breaking the butter into coarse pieces. Add the shortening and pulse again, 5 to 7 times, until the fat is cut into small, pea-size pieces.
- 2. Remove the lid and sprinkle the water over the flour mixture. Pulse again, repeatedly, just until the mixture forms clumpy crumbs (like those pictured above.) The dough should not ball up around the blade.
- 3. Dump the crumbs onto your work surface and pack them together like a snowball. Place on a long piece of plastic wrap, flour dough lightly, and flatten into a disk about 3/4” thick. Wrap in the plastic and refrigerate 1 to 2 hours before rolling. Makes a single crust for a 9” - 9 1/2” deep-dish pie.
Filling
- 1. If you haven't already, prepare the pastry and refrigerate. Prepare it twice if you're making a double crust pie.
- 2. On a sheet of lightly floured wax paper, roll the dough into a 13” - 13 1/2” circle with a floured rolling pin. Invert the pastry over a 9” deep-dish pie pan. Center it, then peel off the paper. Gently tuck the pastry into the pan, without stretching it, letting the edge of the pastry hang over the pan. (NOTE: If you're making a crumb-topped pie and don't need a top crust, trim the overhang to an even 3/4” and shape it into an upstanding rim.) In either case, refrigerate the shell until needed.
- 3. Make the filling: Preheat the oven to 400°. Combine the apples and 1/3 cup of the sugar in a large mixing bowl. Stir well, to mix. Set aside for 5 minutes to 10 minutes, to juice. Stir in the lemon juice, lemon zest, and cinnamon. Mix the remaining 1 tablespoon sugar with the cornstarch. Add to the fruit and mix well. Set aside.
- 4. To make a double crust pie, roll the other pastry into a 12” circle on a sheet of lightly floured wax paper. Turn the filling into the refrigerated pie shell, smoothing the apples with your hands.
- 5. Lightly moisten the rim of the pie shell with a wet finger or pastry brush. Invert the top pastry over the filling, center it, and peel off the paper. Press the top and bottom pastries together along the dampened edge. Using a butter knife, trim the pastry flush with the edge of the pan. Use a large fork to crimp the edge and make several steam vents in the top. Lightly brush the top pastry with milk or cream.
- 6. Place the pie in the center of the oven and bake for 25 minutes. Reduce the heat to 375° and bake another 25 to 30 minutes, until the top is golden brown and you (most likely) see juices bubbling up through the vents. Cool on a rack for at least 1 hour before serving. Makes 8 to 10 servings.
Variations
Apple & Pear Pie
- Replace 2 cups sliced apples with 2 cups sliced fresh pears. Add 2 teaspoons minced, candied ginger if desired. Everyone likes this spin on apple pie.
Five Spice Apple Pie
- Omit nutmeg or cinnamon. Add 1 1/4 teaspoons five spice powder to the apples. Gives your apple pie an exotic twist.
Boiled Cider Apple Pie
- Omit the 1/3 cup sugar. Increase cornstarch to 2 tablespoons. Bring 1 1/2 cups fresh apple cider to a boil in a medium, nonreactive saucepan. Reduce (boil) to about 1/4 cup (pour into a glass measure to check.) Stir into apples. Adds a nice appley kick!
Date Nut Apple Pie
- Replace 1 cup of the apples with 1 cup chopped, pitted dates and 1/2 cup chopped walnuts or pecans.
Caramel Apple Pie
- Bring 1 cup heavy cream, 1 cup light brown sugar and 4 tablespoons unsalted butter to a boil in a smallish saucepan over medium-high heat. Continue to boil for 8 minutes, stirring, until the sauce coats a spoon thickly. Cool to room temperature. Drizzle over any crumb topped or double crusted apple pie.
Oatmeal Crumb Topped Apple Pie
- Combine 1 cup all-purpose flour, 1/2 cup old- fashioned rolled oats, 2/3 cup finely packed light brown sugar, 1/4 teaspoon salt, and 1/4 teaspoon cinnamon in a food processor. Pulse to mix. Scatter 1 stick unsalted butter - cut into pieces - over mixture. Pulse again to make fine crumbs. Dump crumbs into a large bowl and rub till evenly buttery. Refrigerate. Make a pie shell (up through Step 2.) Add filling and bake for 30 minutes. Slide pie out and carefully spread most of the topping over the apples (there's enough topping to save some for muffins or a quick bread; freeze.) Reduce heat to 375°. Bake 25 minutes longer, until bubbly.
Disclaimer
Nutrition information is estimated as a courtesy. If using for medical purposes, please verify information using your own nutritional calculator. Percent Daily Values are based on a 2000 calorie diet.


Pam says
Could you add apple butter to an apple pie?
Katarina says
This pie is beautiful and delicious!